2FA Auth Pilot
2FA Auth Pilot adds an extra layer of security to your WordPress login by requiring a second verification step after the username and password. The plugin implements the industry-standard Time-based One-Time Password (TOTP) algorithm (RFC 6238) and works with any compatible authenticator app, including Google Authenticator, Microsoft Authenticator, Authy, 1Password and Duo.
Even if a password is stolen, phished or reused, attackers cannot complete a login without the one-time code generated on the user’s device. Administrators can require 2FA on a per-role basis, define a grace period during which users must enrol, and whitelist trusted IP ranges that should be exempted from the second factor.
Highlights
- TOTP authentication compatible with any RFC 6238 authenticator app (Google Authenticator, Microsoft Authenticator, Authy, 1Password, Duo, FreeOTP, …).
- Email OTP fallback that sends a 6-digit verification code by email when the authenticator app is unavailable.
- Recovery codes: 5 to 20 single-use backup codes generated during enrolment for emergency access.
- Per-role enforcement: each WordPress role can be set to Required, Optional or Disabled.
- Grace period of up to 90 days for required roles, so existing users are not locked out at the moment 2FA is turned on.
- IP whitelisting with IPv4 and CIDR notation to skip 2FA from trusted networks (office, VPN, monitoring).
- Trusted-device memory: the Remember this device option can suppress 2FA prompts for up to 365 days on a specific browser.
- API protection: XML-RPC and the WordPress REST API can be gated behind 2FA-aware checks.
- QR-code enrolment with a manual secret fallback for environments where the QR code cannot be scanned.
- Configurable time window (1–4 intervals) to compensate for clock drift between the server and the user device.
- Clean uninstall option that removes all plugin data when the plugin is deleted.
Requirements
- WordPress 6.0 or newer.
- PHP 7.4 or newer (PHP 8.x recommended).
- An accurate server clock. TOTP relies on time synchronisation; a clock drift of more than 90 seconds will cause valid codes to be rejected.
- An authenticator app installed on each user’s smartphone, tablet or password manager.
- For the email OTP fallback, a working outgoing-mail setup (the companion Mail Pilot plugin or any SMTP integration is sufficient).
Installation
- Download the plugin ZIP archive.
- In the WordPress admin, open Plugins → Add New → Upload Plugin.
- Select the ZIP file and click Install Now.
- Click Activate Plugin.
- Open Settings → Two-Factor Authentication to start the configuration.
After activation, 2FA is disabled globally by default. No user is forced into the new login flow until the administrator enables the feature and assigns role requirements. This avoids accidentally locking anyone out during the initial rollout.
Configuration
All settings live under Settings → Two-Factor Authentication and are split across four tabs: General, Roles, IP Whitelist and Advanced.
General
The General tab controls how the 2FA challenge behaves once enabled.
| Setting | Description |
|---|---|
| Enable 2FA | Master switch. When off, the plugin is dormant and no login challenge is shown. |
| Company / issuer name | The label that appears next to the entry in the user’s authenticator app. Use the website or organisation name. |
| Code window | Number of 30-second intervals accepted around the current time. Values 1–4 are allowed. A wider window is more tolerant of clock drift but slightly less strict. The default of 1 is usually fine. |
| Recovery code count | How many single-use backup codes to issue at enrolment (5–20). The default is 10. |
| Device memory (days) | How long the Remember this device cookie is valid (0–365). Set to 0 to disable trusted-device memory entirely. |
| Email OTP fallback | When enabled, a Send code by email link appears on the challenge screen. The code is delivered to the user’s account email. |
| Grace period (days) | For roles marked Required, how many days users have to complete enrolment after first login (0–90). During the grace period a reminder banner is shown. |
Keep the grace period long enough for users who do not log in every day. Seven to fourteen days is a balanced default for staff sites.
Roles
The Roles tab assigns one of three policies to every WordPress role:
- Required — 2FA must be configured. After the grace period expires the user is forced to enrol on the next login and cannot dismiss the prompt.
- Optional — Users may enrol from their profile but are never forced.
- Disabled — The 2FA tab is hidden on the user profile and the login flow stays single-factor.
A typical hardened configuration looks like:
| Role | Recommended policy |
|---|---|
| Administrator | Required |
| Editor | Required |
| Shop manager / Author | Required or Optional |
| Subscriber / Customer | Optional |
Set Administrator to Required first and complete your own enrolment before raising the requirement for other roles. Always keep at least one administrator session open in a second browser while testing.
IP whitelist
The IP whitelist tab accepts one entry per line, in either single-address or CIDR form:
203.0.113.42
198.51.100.0/24
10.0.0.0/8
2001:db8::/32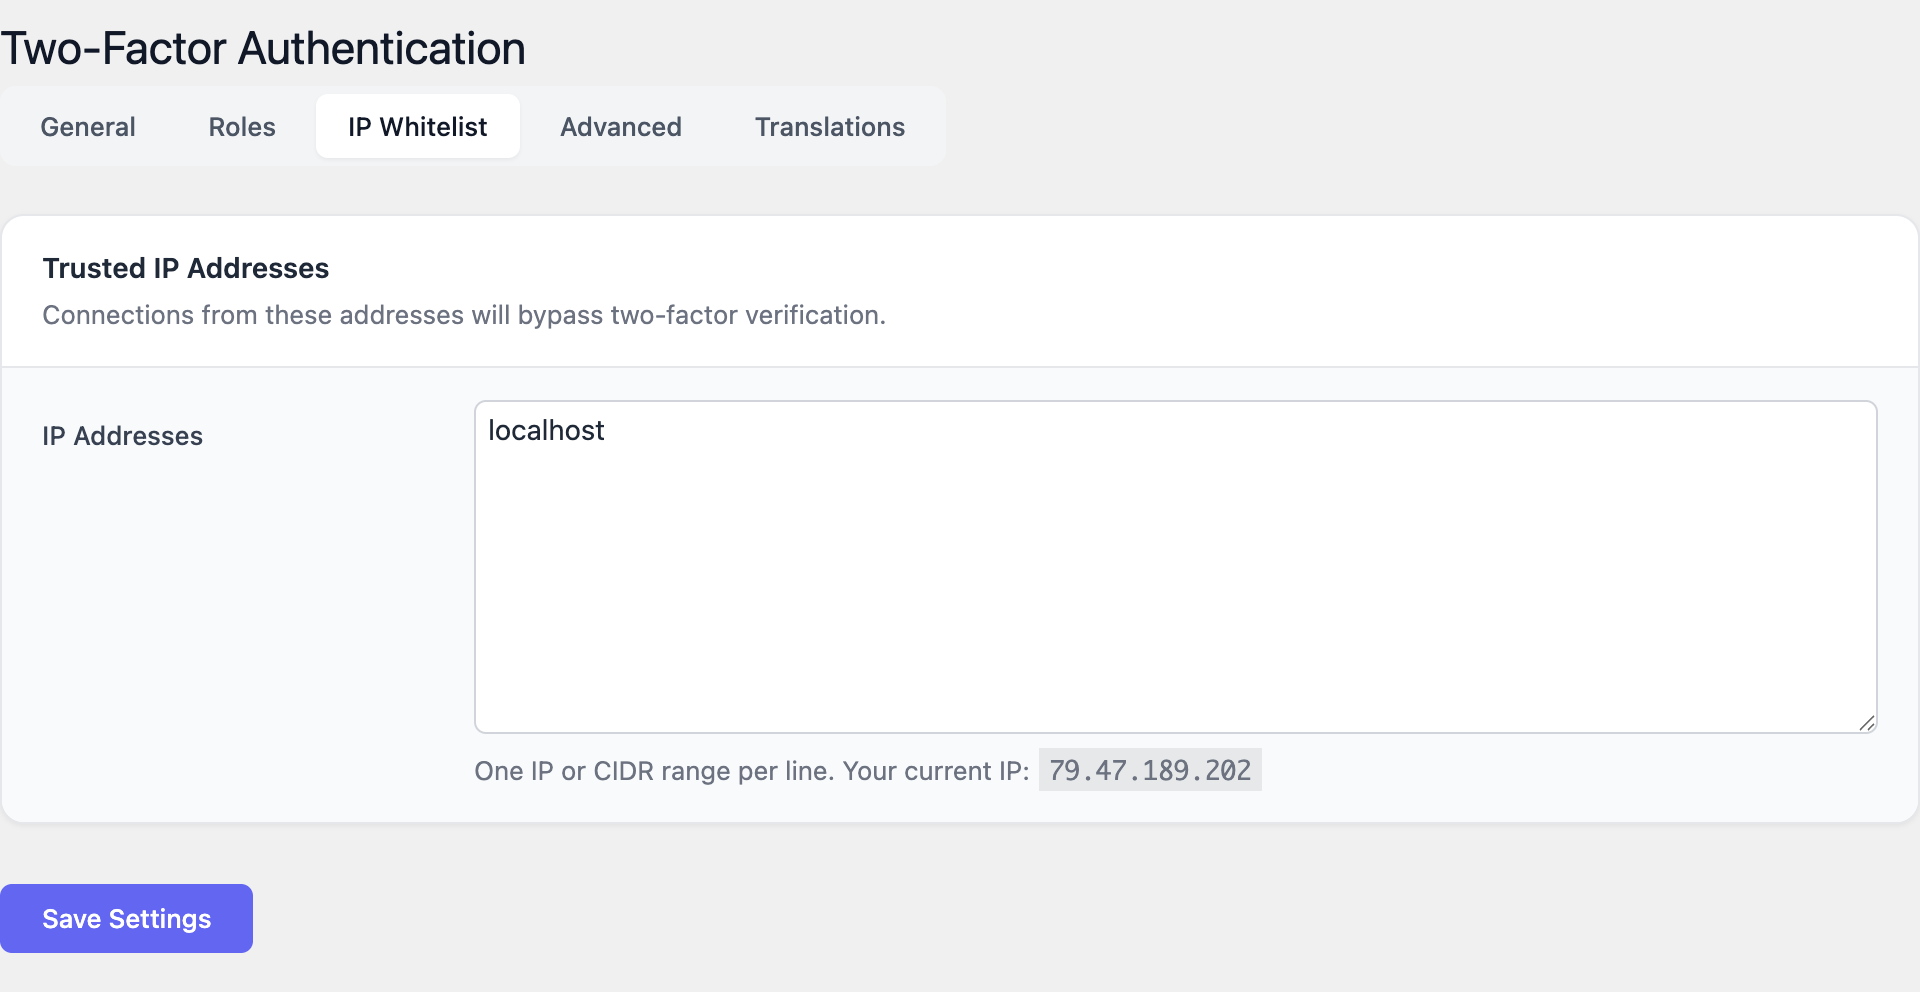
Logins coming from a whitelisted address skip the 2FA challenge but still go through the normal username and password check. This is intended for trusted office networks, jump hosts or monitoring agents.
Whitelist server-to-server sources only. Do not whitelist residential or mobile-network ranges; their addresses rotate and are shared with thousands of unrelated users.
Advanced
The Advanced tab controls integration with the WordPress request surface and data retention:
- Protect XML-RPC — When enabled, requests to
xmlrpc.phpare rejected unless they include a valid application password tied to a user who has completed 2FA enrolment. If you do not use XML-RPC (most modern sites do not) you can leave protection on. - Protect REST API — Authenticated REST endpoints check that the calling user has satisfied 2FA. Anonymous endpoints (such as the public posts feed) are untouched.
- Delete all data on uninstall — When enabled, removing the plugin from Plugins → Installed Plugins also drops every option, user secret, recovery code and device record. Leave this off if you plan to deactivate temporarily.
Usage
For administrators
- Open Settings → Two-Factor Authentication → General and enable 2FA globally.
- Set the Company / issuer name to your site name so that users recognise the entry in their authenticator app.
- Pick a Grace period that gives existing users enough time to enrol — fourteen days is a safe default.
- Switch to the Roles tab and set Administrator to Required.
- Log out and complete your own enrolment from the user profile. Verify that the login challenge appears and that a recovery code works.
- Return to the Roles tab and progressively enable enforcement for Editor, Shop Manager and any other privileged role.
- Optionally add trusted networks to the IP Whitelist tab.
- Communicate the rollout to the team a few days before the grace period expires.
Resetting a locked-out user
If a user loses their phone and all recovery codes:
- Open Users → All Users and edit the affected account.
- Scroll to the Two-Factor Authentication section.
- Click Reset 2FA. The user’s secret, recovery codes and trusted devices are cleared.
- On the next login the user is treated as a new enrolment and goes through the QR-code flow again.
Only administrators can reset 2FA for another user. The action is recorded in the WordPress activity log when an audit plugin is installed.
For end users (enrolment, login, recovery)
First-time enrolment
- Sign in to WordPress with username and password.
- Open Users → Profile (or Howdy → Edit Profile).
- Scroll to the Two-Factor Authentication card and click Enable two-factor authentication.
- Install an authenticator app on your phone if you do not have one. Recommended apps:
- Google Authenticator (iOS, Android)
- Microsoft Authenticator (iOS, Android)
- Authy (iOS, Android, desktop)
- 1Password or Bitwarden (built into the password manager)
- Open the app and choose Add account → Scan QR code.
- Scan the QR code displayed on the WordPress profile page. If scanning fails, tap Enter setup key and type the secret shown below the QR code.
- The app starts producing a new 6-digit code every 30 seconds. Type the current code into the Verify code field and click Activate.
- WordPress displays your recovery codes. Download or print them and store them somewhere safe — a password manager vault or a sealed envelope. Each code works once.
- Confirm that you have saved the recovery codes. Enrolment is complete.
Day-to-day login
- Enter your username and password as usual.
- On the next screen, open your authenticator app and read the current 6-digit code.
- Type the code into the challenge field and click Verify.
- Optional: tick Remember this device for 30 days (the limit depends on the administrator’s Device memory setting). Only do this on devices that you control.
- You are signed in.
If you mistype the code, type it again — the app shows a new code every 30 seconds. Repeated failures will eventually trigger the standard WordPress login-lockout protections.
Using a recovery code
When you do not have your phone with you:
- On the 2FA challenge screen, click Use a recovery code.
- Type one of the codes you saved at enrolment. Hyphens are optional.
- After you log in, open your profile and click Regenerate recovery codes. Recovery codes are single-use; the one you just spent is now invalid.
Email OTP fallback
If the administrator enabled the email OTP fallback you will also see Send code by email on the challenge screen. Clicking it delivers a one-time code to your account email address that is valid for ten minutes. This is intended as an emergency option — it inherits the security of your inbox, so it is not as strong as a TOTP code.
Disabling 2FA on your account
If your role is Optional, open Users → Profile, scroll to Two-Factor Authentication and click Disable. If your role is Required this button is hidden and only an administrator can clear your enrolment.
Screenshots
The screens below illustrate the four main areas of the plugin.
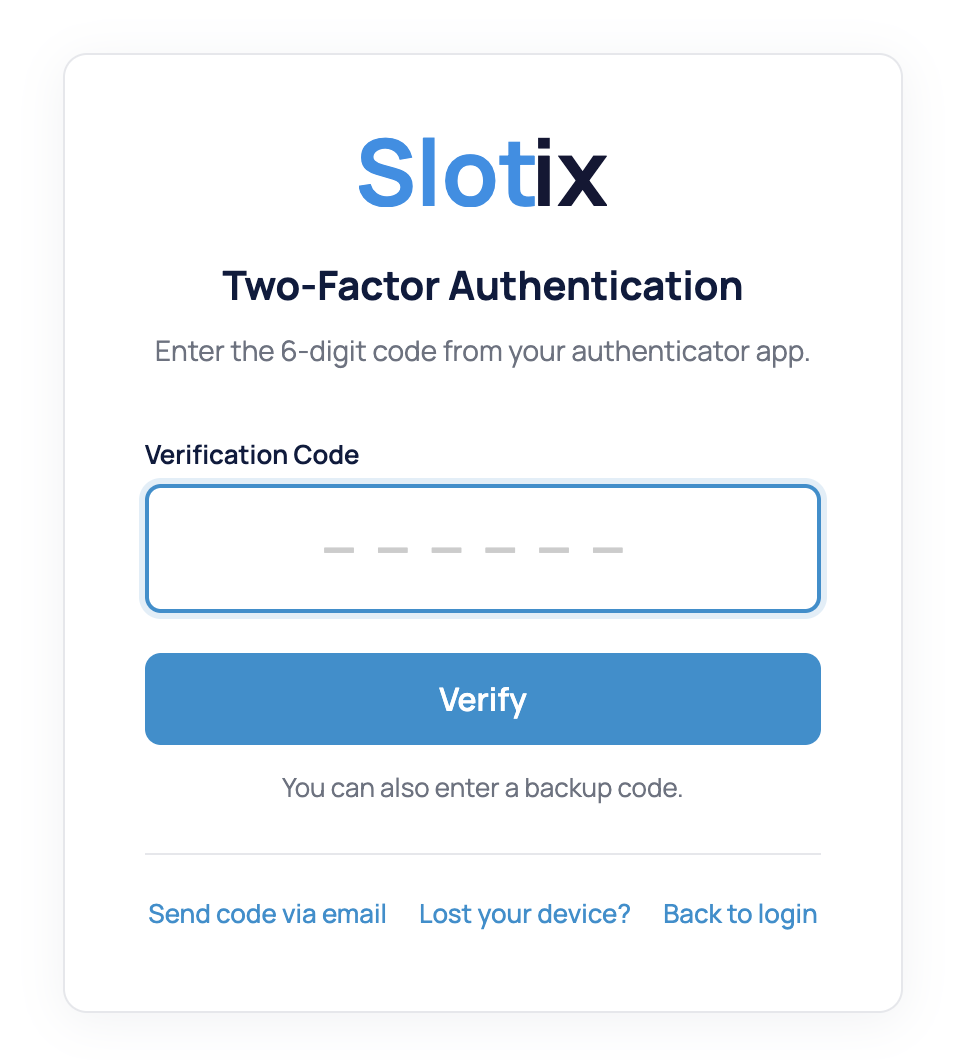
Login challenge
The 2FA prompt is shown after a successful username and password check. The Remember this device checkbox is only visible when the administrator has set the device-memory duration to a non-zero value.
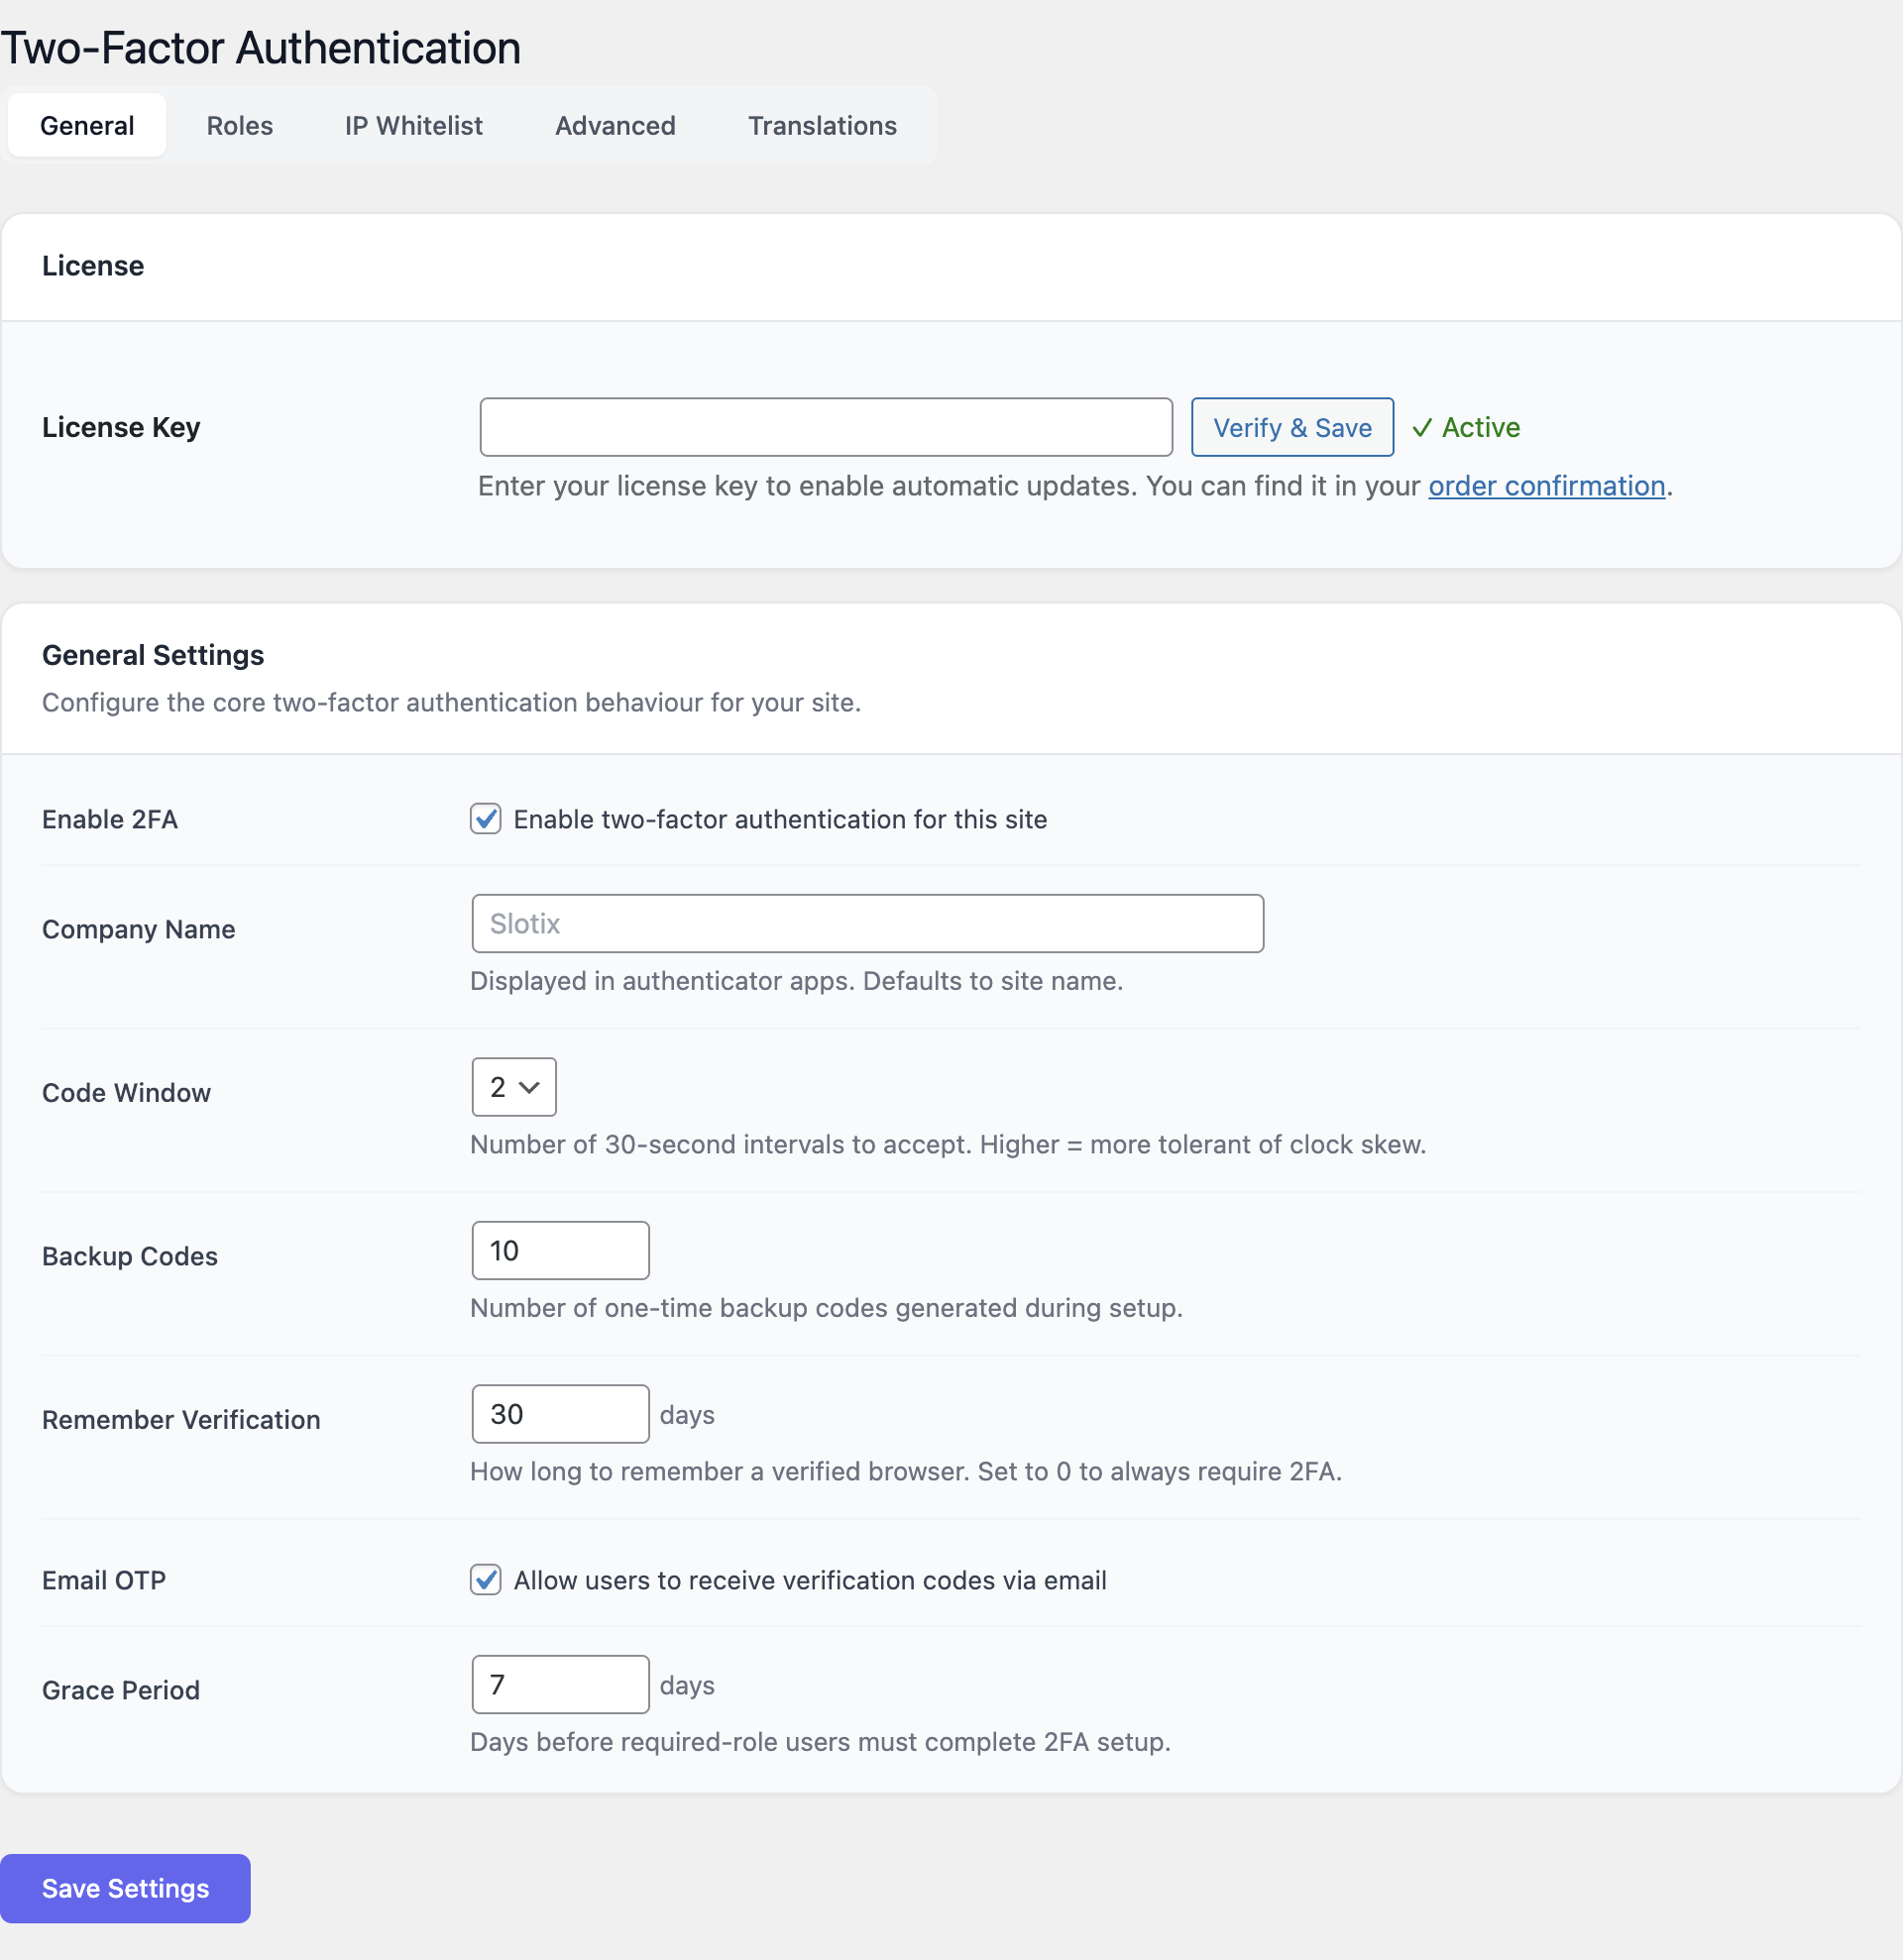
General settings
The General tab centralises the master switch, issuer name, code window, recovery-code count, device memory, email OTP toggle and grace period.
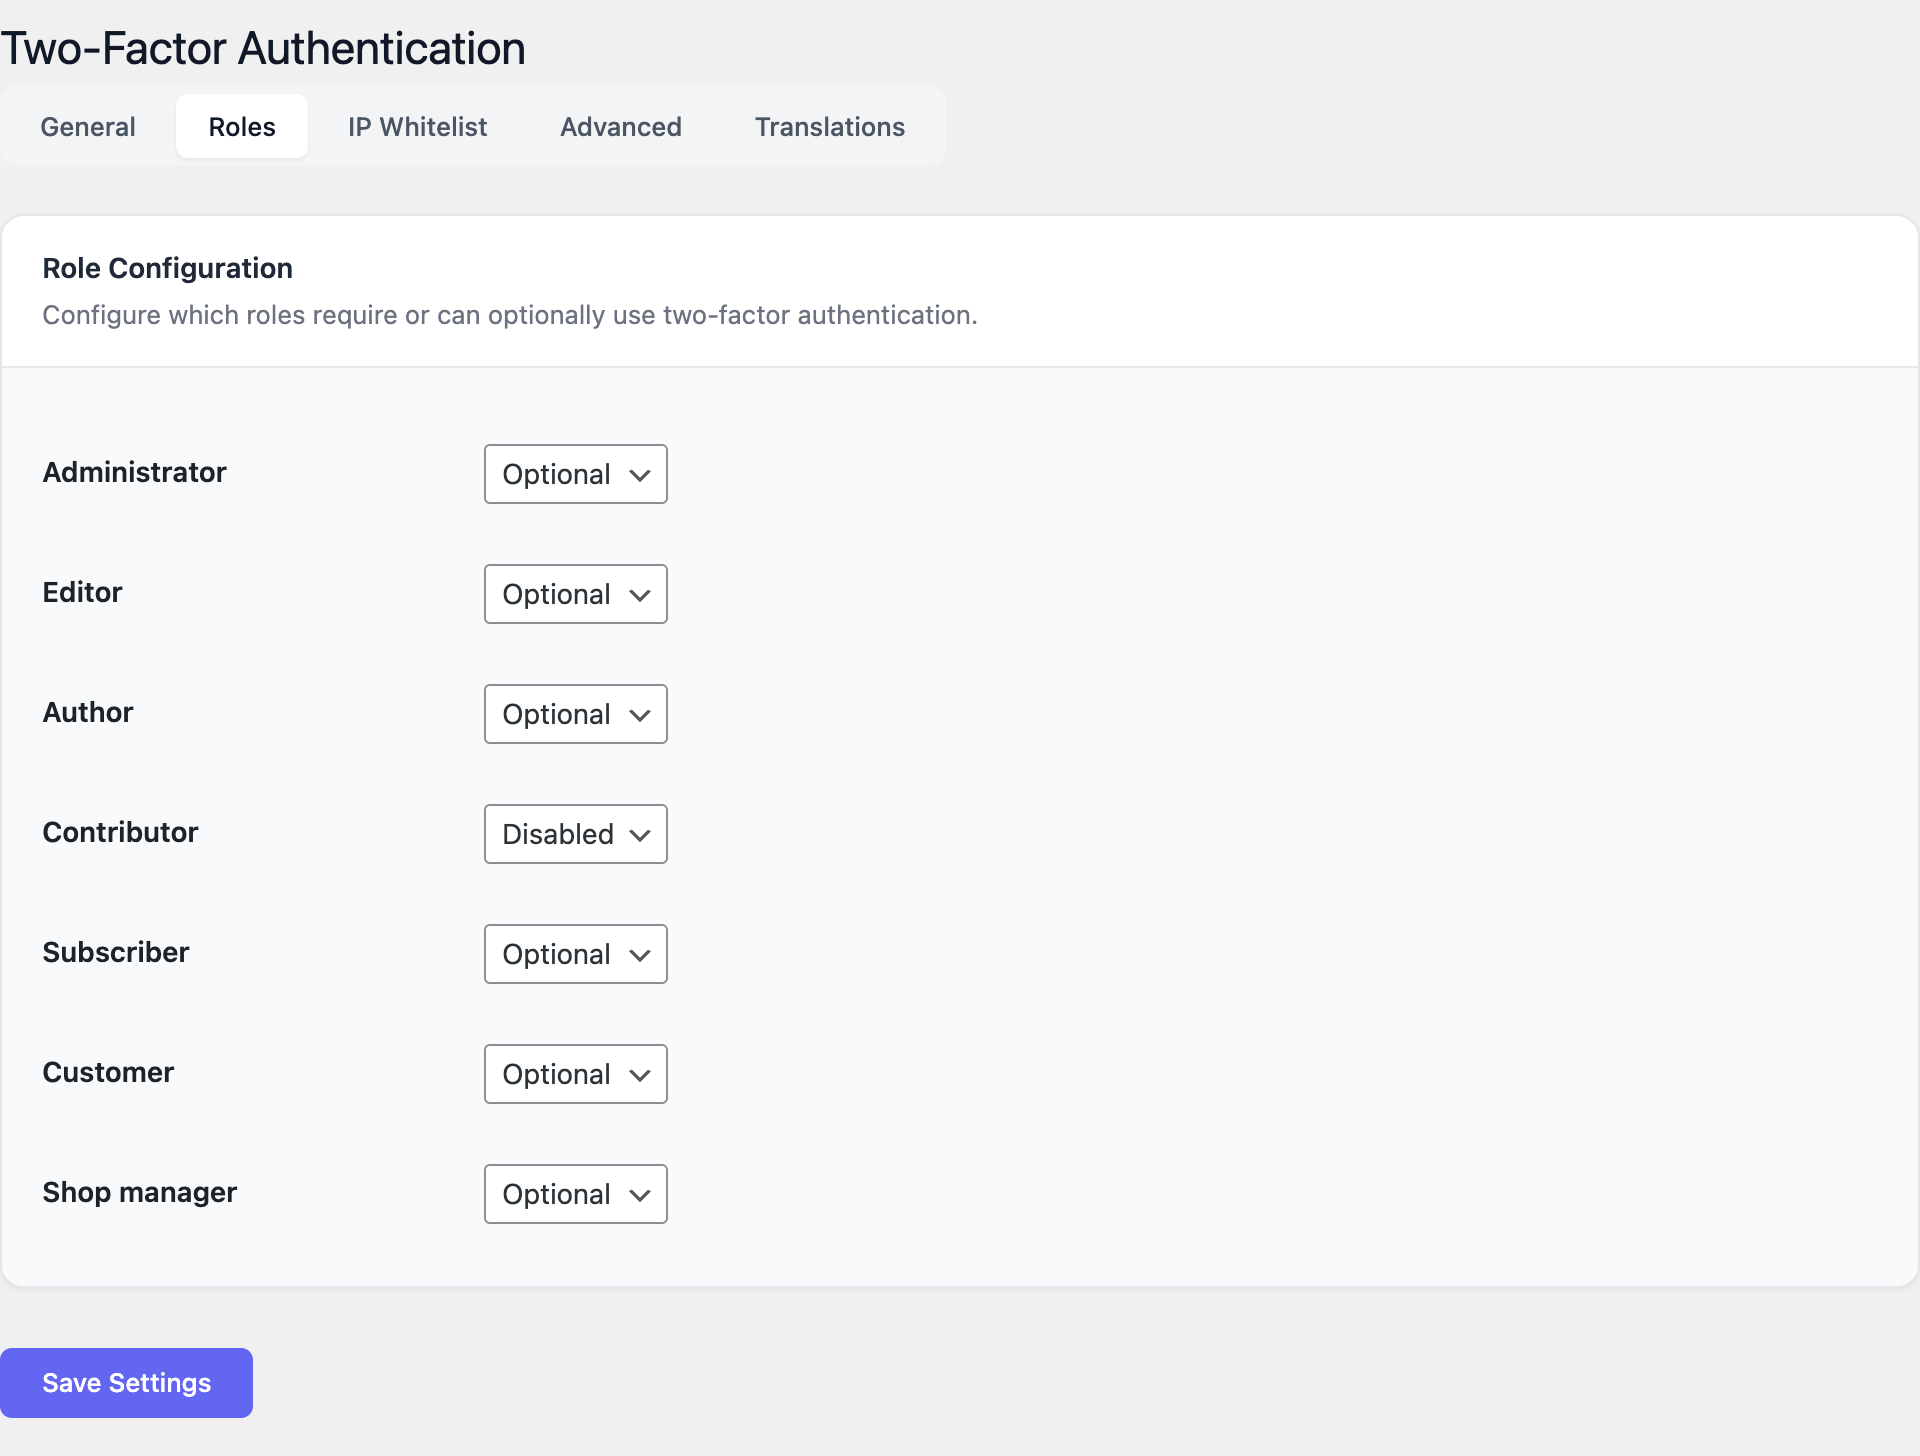
Role enforcement
The Roles tab maps every WordPress role to one of Required, Optional or Disabled. Required roles inherit the grace period configured on the General tab.
IP whitelist
The IP Whitelist tab accepts trusted IPv4, IPv6 or CIDR ranges, one per line. Sessions originating from a whitelisted address skip the 2FA challenge.
FAQ
Which authenticator apps are supported? Any app that implements RFC 6238 TOTP with the default 30-second period and 6-digit codes. This includes Google Authenticator, Microsoft Authenticator, Authy, 1Password, Bitwarden, Duo, FreeOTP and most hardware tokens with TOTP support.
Can users move their secret to a new phone? Yes. Apps such as Authy and 1Password sync the secret across devices automatically. With Google Authenticator, the user can export accounts from the old phone or, if that is no longer possible, an administrator can reset the secret and re-enrol the user.
What happens during the grace period? Required users see a reminder banner on every admin page and a Set up 2FA button on their profile. When the grace period ends, the next login forces enrolment before the user reaches the dashboard.
Are recovery codes reusable? No. Each recovery code is single-use. As soon as one is consumed it is invalidated. Users can regenerate the full set from their profile at any time; regenerating invalidates the old set.
Can I disable 2FA temporarily during a migration? Yes. Open Settings → Two-Factor Authentication → General and turn off the master switch. User secrets and recovery codes are kept in the database, so re-enabling the feature restores every existing enrolment without forcing users to enrol again.
Does the plugin work with WP-CLI? WP-CLI bypasses the web-login flow and is not subject to 2FA. Restrict WP-CLI access at the operating-system level (SSH key, sudoers, jump host) instead.
Is XML-RPC really still in use? Most modern integrations have moved to the REST API or application passwords. If you do not need XML-RPC, leave the protection enabled or disable the endpoint at the web-server level.
Will 2FA Auth Pilot work alongside other 2FA plugins? No. Running two 2FA plugins at the same time leads to double prompts and inconsistent state. Disable any other 2FA plugin before activating 2FA Auth Pilot.
Does it support hardware security keys (WebAuthn / FIDO2)? The current version focuses on TOTP and email OTP. Hardware-key support is tracked on the roadmap.
Where are the secrets stored? Each user’s TOTP secret and recovery-code hashes are stored in the WordPress user-meta table on the same database as the rest of the site. Recovery codes are hashed; the plaintext is shown only once at generation time.
Troubleshooting
“Invalid code” even though the app shows the right number.
The most common cause is clock drift. TOTP codes are tied to the current time at 30-second resolution. Check that the server clock is synchronised (NTP / chrony) and that the phone clock is set to Automatic. As a temporary workaround, increase the Code window in the General settings to 2 or 3.
A user lost the phone and all recovery codes. An administrator can reset the user’s 2FA from Users → All Users → Edit user → Reset 2FA. The user will go through the QR-code flow again on the next login. If the locked-out user is the only administrator, see the next item.
The only administrator is locked out. Connect to the database (phpMyAdmin or WP-CLI) and delete the relevant user-meta rows:
DELETE FROM wp_usermeta
 WHERE user_id = <admin-id>
   AND meta_key LIKE 'tfa\_auth\_pilot%';
The administrator will then log in normally and can re-enrol.
The QR code is not displayed. Check that PHP has the GD extension enabled. If GD is missing, the plugin falls back to a text-mode setup key — the user can type the secret manually into the authenticator app.
Email OTP messages do not arrive. Send a test email from your transactional-mail plugin (for example Mail Pilot → Test email). If that test fails, fix the outgoing-mail configuration first. Codes are also written to the WordPress activity log when an audit plugin is installed.
REST API integration suddenly returns 401. Enabling Protect REST API requires authenticated calls to come from a 2FA-completed user. Switch the integration to use application passwords issued by a user whose role has 2FA satisfied.
Login is slow after enabling 2FA. A small delay (under one second) is expected because of the email-OTP and challenge rendering. Larger delays usually indicate an underlying mail-server timeout. Disable the email OTP fallback temporarily to confirm.
Trusted-device cookies disappear immediately. Devices are tracked by a signed cookie tied to the browser. Private/incognito windows, aggressive cookie cleaners and content blockers may strip it. Reduce reliance on Remember this device in those environments.
For anything not covered here, contact support with: WordPress version, PHP version, active plugins, the exact error message and a short description of the steps that lead to it.